快速开始一个基于SpringMVC框架的web项目
开发工具 Eclipse neon.2
运行环境 tomcat8.5
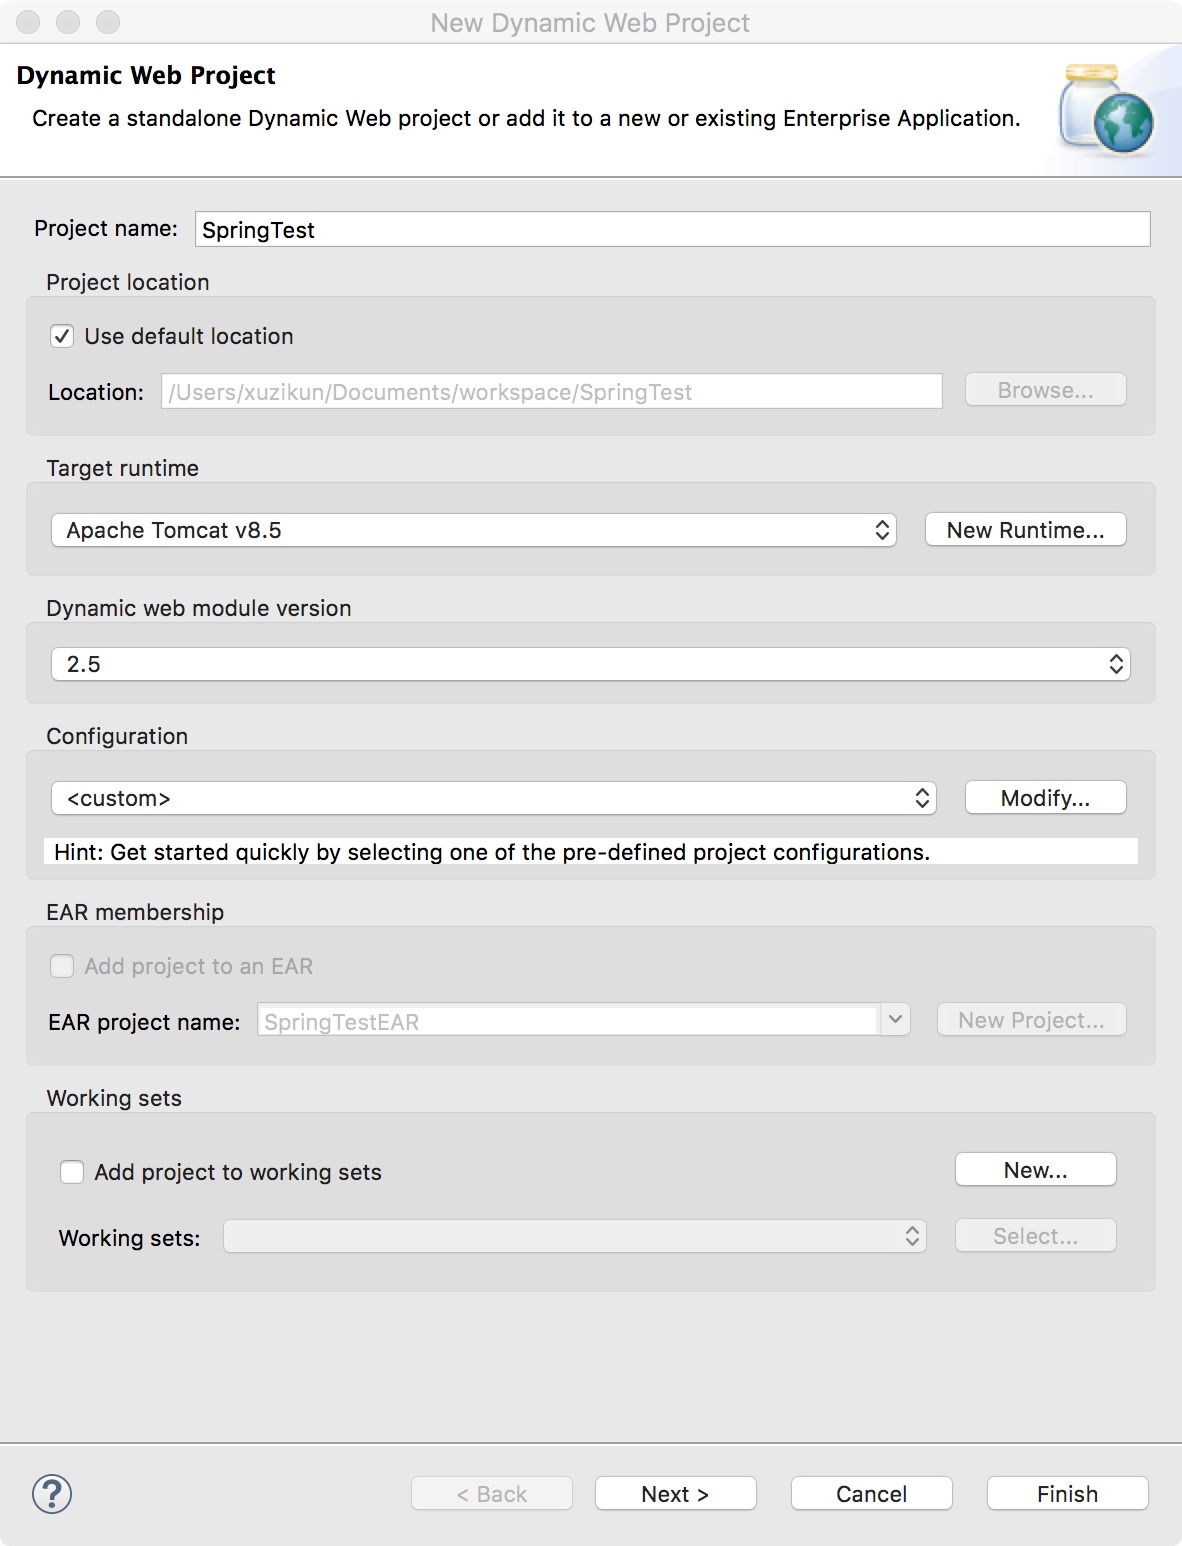
1.在Eclipse中新建一个web项目:File-New-Dynamic Web Project
输入项目名称,Target runtime这里选择已经配置好的tomcatv8.5,Dynamic web module version 选择2.5来自定义web.xml。 Finish
2.新建好项目后,将spring相关jar包直接复制到WebContent-Web-INF-lib目录下.
官网链接:http://repo.springsource.org/libs-release-local/org/springframework/spring/ 选择相应版本即可。
除了从spring官方网站上下载的jar包外,还需要额外添加standard.jar;jstl.jar;commons-logging.jar这三个包.
3.在WebContent-Web-web.xml中配置前端控制器. web.xml代码如下
 1 <?xml version="1.0" encoding="UTF-8"?>
 2 <web-app xmlns:xsi="http://www.w3.org/2001/XMLSchema-instance" xmlns="http://java.sun.com/xml/ns/javaee" xsi:schemaLocation="http://java.sun.com/xml/ns/javaee http://java.sun.com/xml/ns/javaee/web-app_2_5.xsd" id="WebApp_ID" version="2.5">
 3   <display-name>Springtest</display-name>
 4   <welcome-file-list>
 5     <welcome-file>index.jsp</welcome-file>
 6   </welcome-file-list>
 7   <!--配置dispatcherservlet-->
 8 <servlet>
 9         <servlet-name>springmvc</servlet-name>
10         <servlet-class>org.springframework.web.servlet.DispatcherServlet</servlet-class>
11         <init-param>
12             <param-name>contextConfigLocation</param-name>
13             <param-value>classpath:spring-mvc.xml</param-value>
14         </init-param>
15     </servlet>
16     <servlet-mapping>
17         <servlet-name>springmvc</servlet-name>
18         <url-pattern>*.do</url-pattern>
19     </servlet-mapping>
20 <!--配置字符过滤器-->
21     <filter>
22         <filter-name>characterEncodingFilter</filter-name>
23         <filter-class>org.springframework.web.filter.CharacterEncodingFilter</filter-class>
24         <init-param>
25             <param-name>encoding</param-name>
26             <param-value>utf-8</param-value>
27         </init-param>
28     </filter>
29     <filter-mapping>
30         <filter-name>characterEncodingFilter</filter-name>
31         <url-pattern>*.do</url-pattern>
32     </filter-mapping>
33 </web-app>
4.在src包下,新建xml文件,命名为spring-mvc.xml。代码如下,其中base-package为自己项目的包名
 1 <?xml version="1.0" encoding="UTF-8"?>
 2 <beans xmlns="http://www.springframework.org/schema/beans"
 3     xmlns:xsi="http://www.w3.org/2001/XMLSchema-instance"
 4     xmlns:aop="http://www.springframework.org/schema/aop"
 5     xmlns:mvc="http://www.springframework.org/schema/mvc"
 6     xmlns:jdbc="http://www.springframework.org/schema/jdbc"
 7     xmlns:p="http://www.springframework.org/schema/p"
 8     xmlns:context="http://www.springframework.org/schema/context"
 9     xsi:schemaLocation="http://www.springframework.org/schema/jdbc http://www.springframework.org/schema/jdbc/spring-jdbc-4.1.xsd
10         http://www.springframework.org/schema/mvc http://www.springframework.org/schema/mvc/spring-mvc-4.1.xsd
11         http://www.springframework.org/schema/beans http://www.springframework.org/schema/beans/spring-beans.xsd
12         http://www.springframework.org/schema/context http://www.springframework.org/schema/context/spring-context-4.1.xsd
13         http://www.springframework.org/schema/aop http://www.springframework.org/schema/aop/spring-aop-4.1.xsd">
14
15
16     <!-- 使用注解的包,包括子集 -->
17     <context:component-scan base-package="com.amazon"/>
18     <!-- 视图解析器 -->
19     <bean id="viewResolver"
20         class="org.springframework.web.servlet.view.InternalResourceViewResolver">
21         <property name="prefix" value="/WEB-INF/jsp/" />
22         <property name="suffix" value=".jsp"></property>
23     </bean>
24
25 </beans>
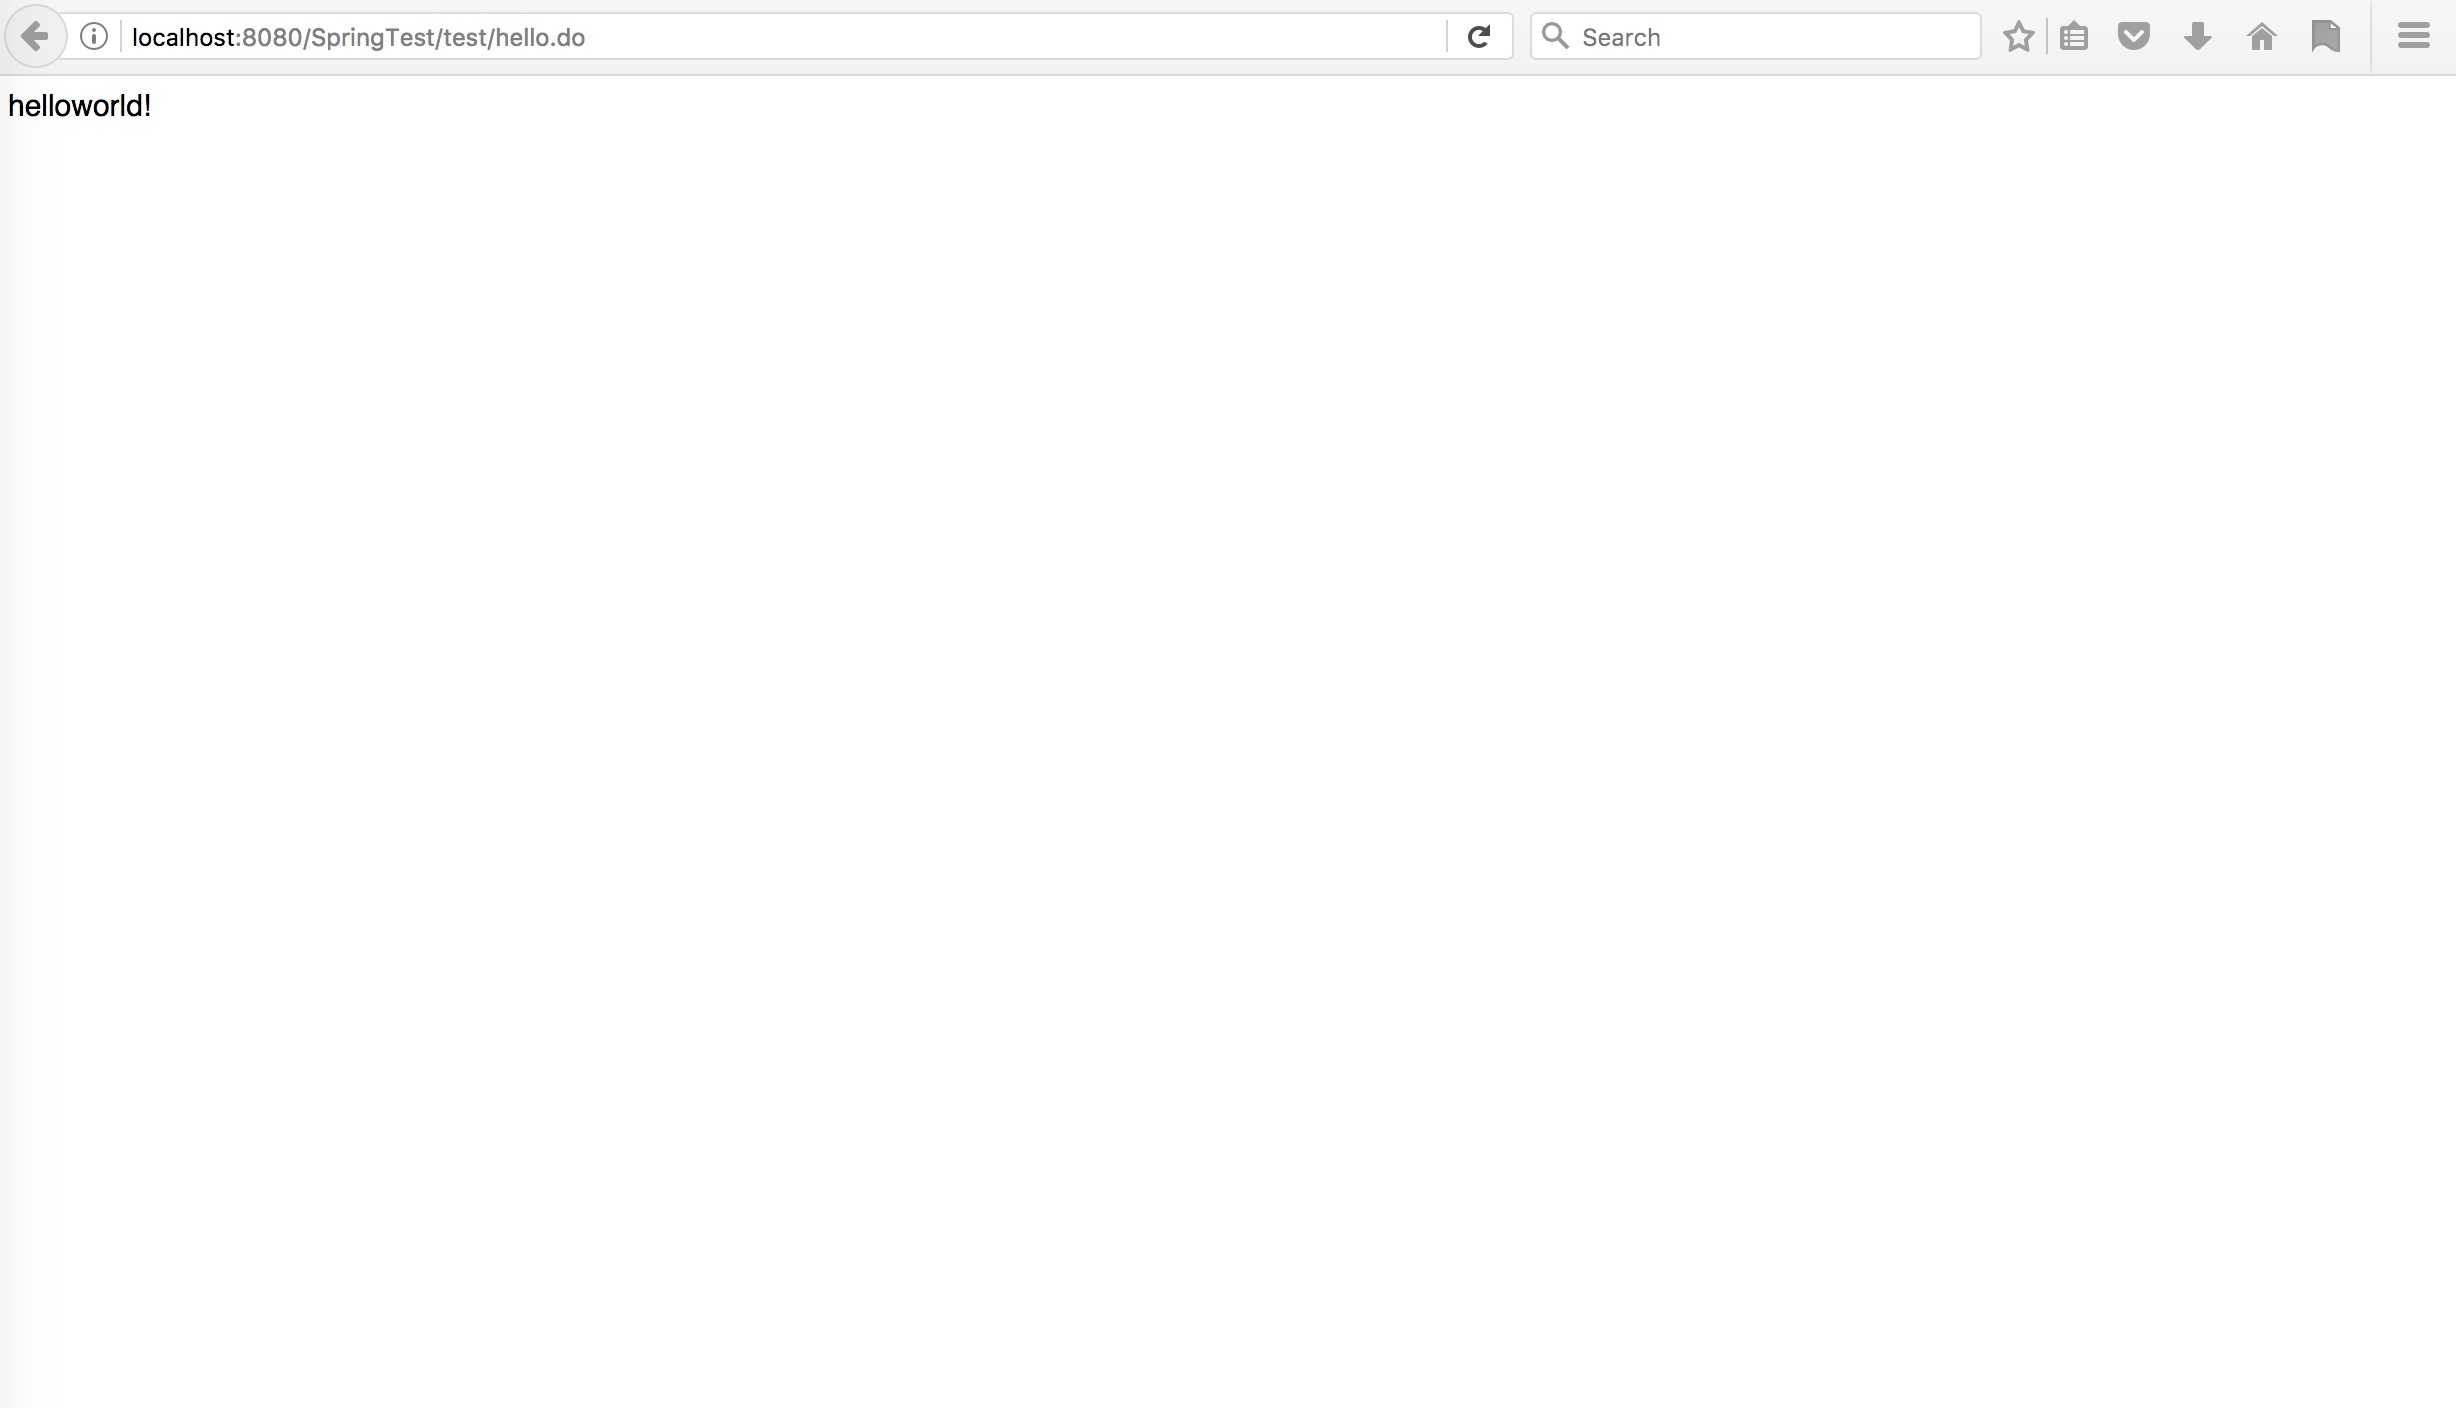
5.在项目包内新建class,命名为testcontroller.java. 请求路径为/test/hello,跳转到hello.jsp,并向ModelAndView中添加了一个string对象
 1 package com.amazon.springtest.controller;
 2
 3 import javax.servlet.http.HttpServletRequest;
 4 import org.springframework.stereotype.Controller;
 5 import org.springframework.web.bind.annotation.RequestMapping;
 6 import org.springframework.web.servlet.ModelAndView;
 7
 8 @Controller
 9 @RequestMapping("/test")
10 public class TestController {
11     @RequestMapping("/hello")
12     public ModelAndView test() {
13         String displayString = "helloworld!";
14         ModelAndView modelAndView = new ModelAndView();
15         modelAndView.addObject("teststring", displayString);
16         modelAndView.setViewName("hello");
17         return modelAndView;
18     }
19
20 }
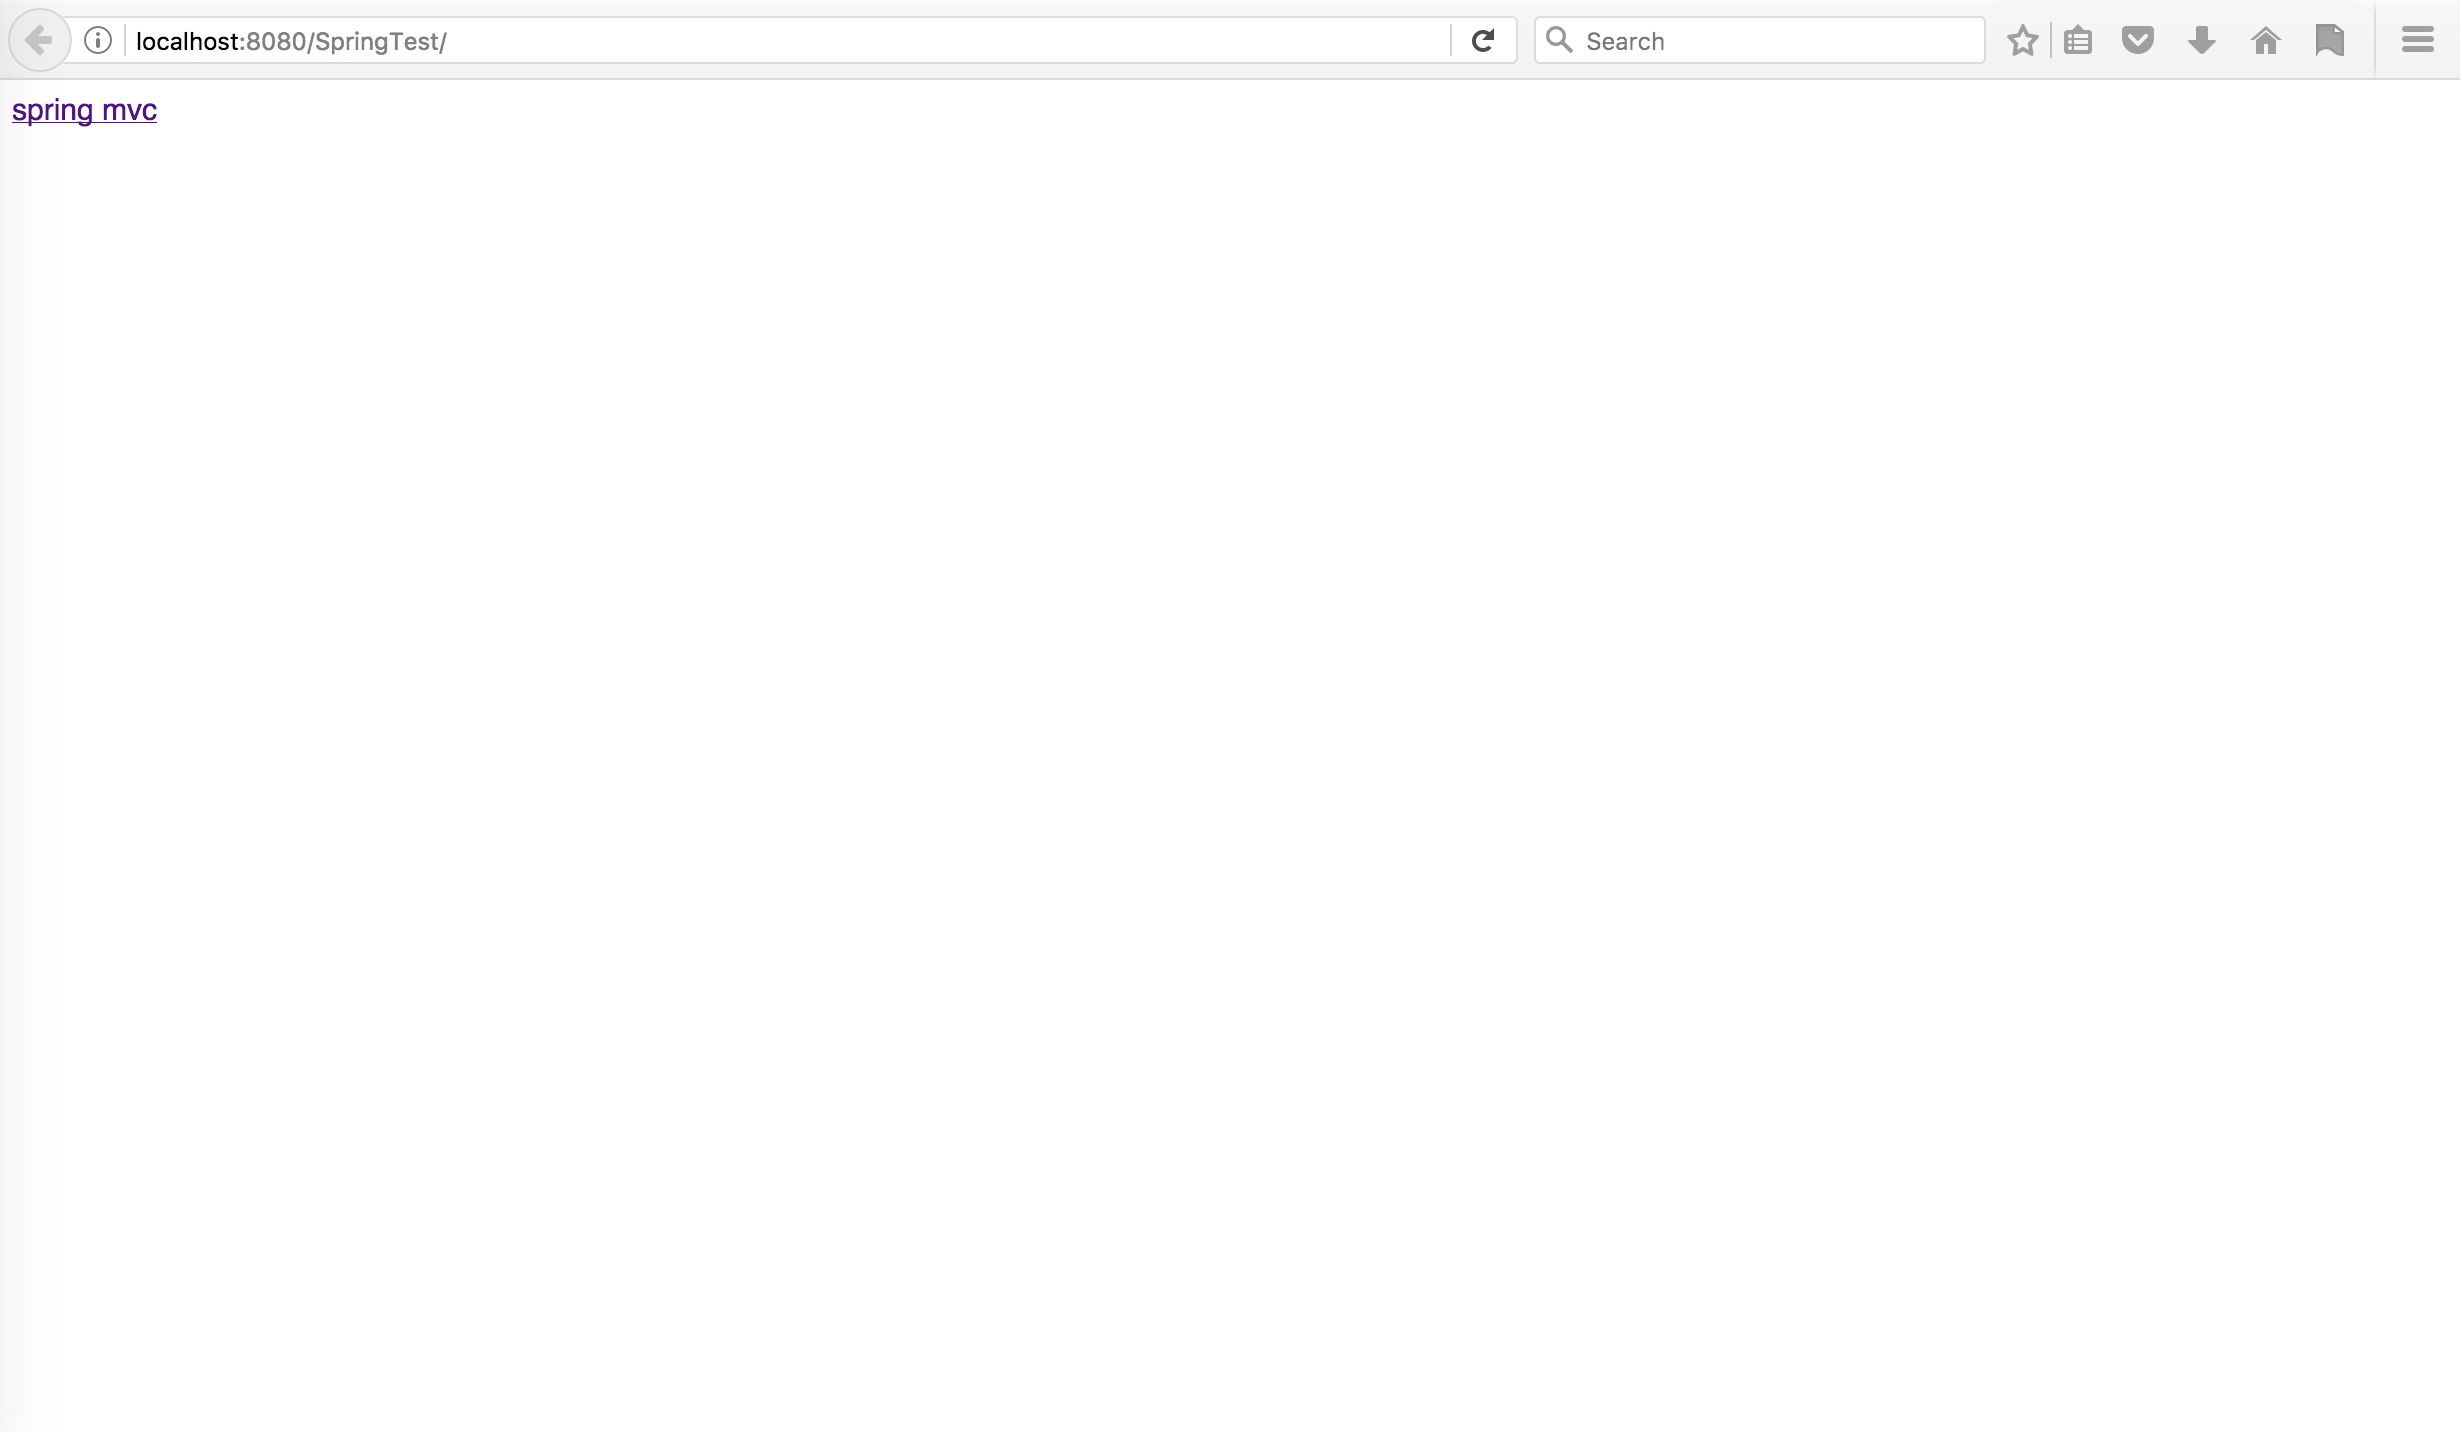
6.在Web-content下的index.jsp 添加一个链接,会根据请求路径,找到Controller中的test()方法。
 1 <%@ page language="java" contentType="text/html; charset=UTF-8"
 2     pageEncoding="UTF-8"%>
 3 <!DOCTYPE html PUBLIC "-//W3C//DTD HTML 4.01 Transitional//EN" "http://www.w3.org/TR/html4/loose.dtd">
 4 <html>
 5 <head>
 6 <meta http-equiv="Content-Type" content="text/html; charset=UTF-8">
 7 <title>Insert title here</title>
 8 </head>
 9 <body>
10 <a href="test/hello.do">spring mvc</a>
11 </body>
12 </html>
在WEB-INF/jsp目录下的hello.jsp, 采用EL表达式输出在controller中添加的 teststring.
 1 <%@ page language="java" contentType="text/html; charset=UTF-8"
 2     pageEncoding="UTF-8"%>
 3 <!DOCTYPE html PUBLIC "-//W3C//DTD HTML 4.01 Transitional//EN" "http://www.w3.org/TR/html4/loose.dtd">
 4 <html>
 5 <head>
 6 <meta http-equiv="Content-Type" content="text/html; charset=UTF-8">
 7 <title>Insert title here</title>
 8 </head>
 9 <body>
10 ${teststring}
11 </body>
12 </html>
7.运行项目,点击spring mvc,返回hello world