1:首先对JWT进行简单介绍
参考官网:https://jwt.io/
什么是JWT:Json web token,是为了在网络应用环境间传递声明而执行的一种基于JSON的开放标准,适合用于分布式站点的单点登录(SSO)场景,一般被用来在身份提供者和服务提供者间传递被认证的用户身份信息,以便于从资源服务器获取资源
2:Java使用方法(以下代码中涉及三个工具类,本文并未提及其代码,如有需要,请下载文件:jwtUtils.zip,里面是三个工具类,解压放入项目即可)
地址:https://franciseric.oss-cn-shanghai.aliyuncs.com/bokeyuan/jwtUtils.zip
2.1:引入依赖
        <dependency>
            <groupId>io.jsonwebtoken</groupId>
            <artifactId>jjwt-api</artifactId>
            <version>0.11.0</version>
        </dependency>
        <dependency>
            <groupId>io.jsonwebtoken</groupId>
            <artifactId>jjwt-impl</artifactId>
            <version>0.11.0</version>
        </dependency>
        <dependency>
            <groupId>io.jsonwebtoken</groupId>
            <artifactId>jjwt-jackson</artifactId>
            <version>0.11.0</version>
        </dependency>
2.2:授权中心配置文件需要的参数
auth:
  jwt:
  //公私钥路径 后面两个文件后缀为了方便区分  此处授权中心需要公钥私钥的生成,所以两个路径都需要,而提供资源的服务则只需要其中之一,比如使用公钥解密,私钥加密
// 这个公钥私钥地址一定要改成自己电脑对应放公钥私钥的地址
   privateKeyPath: E:\\JavaEESoftware\\JavaData\\auth_key\\rsa.pri
    publicKeyPath: E:\\JavaEESoftware\\JavaData\\auth_key\\rsa.pub
    //签名 增加密码的复杂性
    secret: (&^&^*^*%*&$&^(*&)(*&()^*(^(IUGhoindsoihfowanoisjndfoihn645654
    //cook名称
    cookieName: AUTH-TOKEN
    //过期时间 分钟
    exprieTime: 180
2.3:编写配置文件参数的实体类
@ConfigurationProperties("auth.jwt")
@Data
@Slf4j
public class JwtProperties {

    private String privateKeyPath;
    private String publicKeyPath;
    private String secret;
    private String cookieName;
    private Integer exprieTime;

//使用jdk的两个key  它们的作用是能够保存公钥私钥内容,方便获取
    private PublicKey publicKey;
    private PrivateKey privateKey;
}
2.4:编写获取公钥私钥的方法,以及生成的方法
@Data
@Slf4j
@ConfigurationProperties("auth.jwt")
public class JwtProperties {

    private String privateKeyPath;
    private String publicKeyPath;
    private String secret;
    private String cookieName;
    private Integer exprieTime;


    private PublicKey publicKey;
    private PrivateKey privateKey;

    @PostConstruct
    public void init() {


        try {
            File priFile = new File(privateKeyPath);
            File pubFile = new File(publicKeyPath);
            //判断文件是否存在

            if (!priFile.exists() || !pubFile.exists()) {
                //RsaUtils这个工具在jwtUtils文件中,下载即可用
                RsaUtils.generateKey(publicKeyPath, privateKeyPath, secret);
            }
            //存在就读取  并赋值给键
            this.privateKey = RsaUtils.getPrivateKey(privateKeyPath);
            this.publicKey = RsaUtils.getPublicKey(publicKeyPath);
        } catch (Exception e) {
            log.error("生成公钥私钥失败");
        }
    }
}
2.5:编写测试controller
@RestController
@RequestMapping("auth")
public class AuthController {

    @Autowired
    private AuthService authService;

    @Autowired
    private JwtProperties jwtProperties;

    @PostMapping("accredit")
    public Resp<Object> accredit(@RequestParam("username")String userName,
                                 @RequestParam("password")String password,
                                 HttpServletRequest request,
                                 HttpServletResponse response){
        String token = this.authService.accredit(userName, password);

        // 4.把jwt类型的token放入cookie中
        CookieUtils.setCookie(request, response, this.jwtProperties.getCookieName(), token, this.jwtProperties.getExprieTime() * 60);

        return Resp.ok(null);
    }
}
2.6:编写service
@Servicepublic class AuthService {

    @Autowired
    private JwtProperties jwtProperties;

    @Autowired
    private UmsClient umsClient;

    public String accredit(String userName, String password) {
        // 1.调用用户查询接口  此处是已经调用别的微服务,那么如果是测试的话,完全可以先写死这些信息,先查看公私钥是否正常,以及token是否生成
        UserEntity userEntity = this.umsClient.queryUserByPad(userName, password).getData();// 2.不存在直接返回
        if (userEntity== null) {
//此处异常是自定义异常,代码拿去另行指定即可
            throw new UserException("用户名或者密码输入有误!");
        }

        try {
            // 3.制作jwt
            Map<String, Object> map = new HashMap<>();
            map.put("userId", userEntity.getId());
            map.put("userName", userEntity.getUsername());
              /**
              此处就是jwt生成token,使用的是私钥,那么资源提供方,只需要将公钥配置即可此处也可以使用公钥加密,那么资源提供方则反之使用私钥即可解密
        这么map就是一个用户信息,在资源提供方解密获得这个用户后,这个用户就可以获取相应的资源访问权限
              /
            return JwtUtils.generateToken(map, this.jwtProperties.getPrivateKey(), this.jwtProperties.getExprieTime());
        } catch (Exception e) {
            e.printStackTrace();
        }
        return null;
    }
}
2.7:启动类需要增加一个注解,来启用配置实体类
@SpringBootApplication
@EnableFeignClients
@EnableDiscoveryClient
@EnableConfigurationProperties({JwtProperties.class})//就是这个配置,配置类名叫什么,就写什么即可
public class AuthApplication {

    public static void main(String[] args) {
        SpringApplication.run(AuthApplication.class, args);
    }

}
2.8:打开postman,来进行测试(省略。。。)
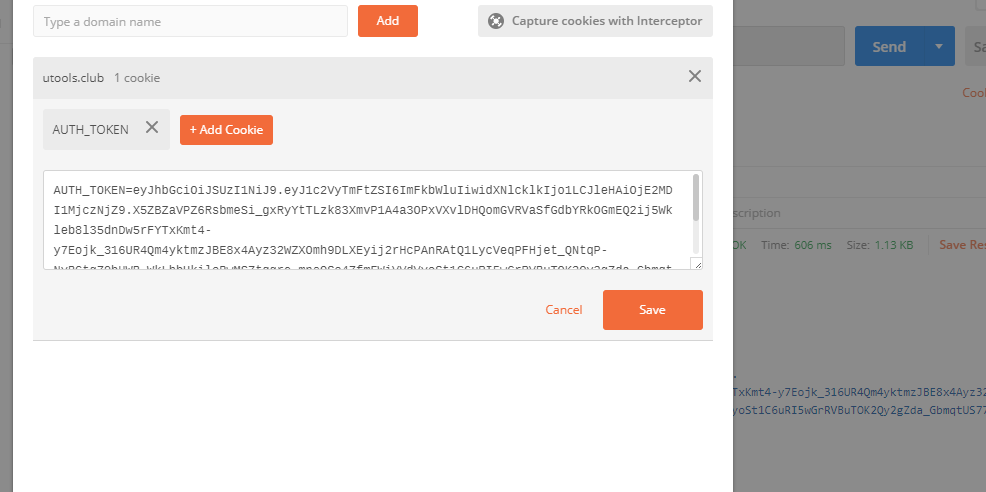
postman测试,显示正常,但是这个cookie可能没有出现,但是在请求头我们可以看的到,其实浏览器端已经能够设置进去了,只是postman有时候无法设置,解决方案是:使用内网穿透,映射到Auth这个服务的端口,然后使用穿透的地址+controller访问地址,就能够使得postman成功设置cookie
3:getway网关工程使用jwt(getway网关使用参考另一篇博客即可)
server:
  port: 21217
spring:
  cloud:
    gateway:
      routes:
        - id: user-route
          uri: lb://user-service
          #断言
          predicates:
            - Path=/user/**
        - id: auth-route
          uri: lb://auth-service
          #断言
          predicates:
            - Path=/api/auth/**
          filters:
            - RewritePath=/api(?<segment>/?.*), $\{segment}
auth:
  jwt:
//由于加密使用的是私钥,所以此处使用公钥来进行解密
    publicKeyPath: E:\\JavaEESoftware\\GmallNew\\gmall-jwt-key\\rsa.pub
    cookieName: AUTH_TOKEN
3.1:在网关工程里编写相应的配置实体类,此处说的配置实体类,是我们自定义的配置,比如auth:开头的
@ConfigurationProperties("auth.jwt")
@Data
@Slf4j
public class JwtProperties {

    private String publicKeyPath;
    private String cookieName;


    private PublicKey publicKey;

    @PostConstruct
    public void init() {


        try {
            this.publicKey = RsaUtils.getPublicKey(publicKeyPath);


        } catch (Exception e) {
            log.error("读取公钥失败");
        }
    }
}
3.2:编写过滤器
@Component
public class AuthGetwayFilter implements GatewayFilter {


    @Autowired
    private JwtProperties jwtProperties;

    @Override
    public Mono<Void> filter(ServerWebExchange exchange, GatewayFilterChain chain) {

        //获取对象
        ServerHttpRequest request = exchange.getRequest();
        ServerHttpResponse response = exchange.getResponse();


        //从cookie中获取jwt类型的token
        MultiValueMap<String, HttpCookie> cookies = request.getCookies();
        //判断cookie是否为null
        if(CollectionUtils.isEmpty(cookies) || !cookies.containsKey(this.jwtProperties.getCookieName())){
            //拦截这个请求 设置状态码为身份认证未通过
            response.setStatusCode(HttpStatus.UNAUTHORIZED);
            return response.setComplete();
        }

        HttpCookie cookie = cookies.getFirst(jwtProperties.getCookieName());
        //判断是否为空
        if(cookie==null || StringUtils.isEmpty(cookie.getValue())){
            //拦截这个请求 设置状态码为身份认证未通过
            response.setStatusCode(HttpStatus.UNAUTHORIZED);
            return response.setComplete();
        }
        try {
            //解析jwt
            JwtUtils.getInfoFromToken(cookie.getValue(),this.jwtProperties.getPublicKey());
            //放行请求
            return chain.filter(exchange);
        } catch (Exception e) {
            //出现异常 拦截这个请求 设置状态码为身份认证未通过
            response.setStatusCode(HttpStatus.UNAUTHORIZED);
            return response.setComplete();
        }
    }
}
3.3:还需编写一个工厂类来操作这个过滤器
@Component
public class AuthGatewayFilterFactory extends AbstractGatewayFilterFactory {

    @Autowired
    private AuthGetwayFilter authGetwayFilter;

    @Override
    public GatewayFilter apply(Object config) {
//这里可以使用内部类来做,但是显得有点不好看,就分开了
        return authGetwayFilter;
    }
}
3.4:在配置中使用过滤器
server:
  port: 21217
spring:
  cloud:
    gateway:
      routes:
        - id: user-route
          uri: lb://user-service
          #断言
          predicates:
            - Path=/user/**
          filters://在需要进行登录授权的服务网关filters下,增加这个 - Auth即可对这个路径进行过滤
            - Auth
        - id: auth-route
          uri: lb://auth-service
          #断言
          predicates:
            - Path=/api/auth/**
          filters:
            - RewritePath=/api(?<segment>/?.*), $\{segment}
auth:
  jwt:
//由于加密使用的是私钥,所以此处使用公钥来进行解密
    publicKeyPath: E:\\JavaEESoftware\\GmallNew\\gmall-jwt-key\\rsa.pub
    cookieName: AUTH_TOKEN
3.3:还是一样的,启动类需要增加注解,将实体类写入,以及pom文件增加jwt的依赖
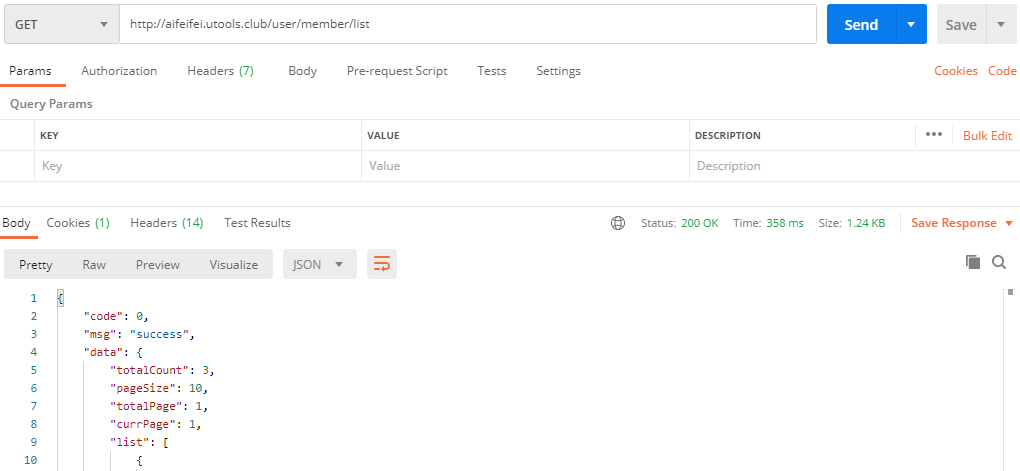
3.4:最后使用网关,测试User的相关服务,会发现,提示未授权,那么这个时候,就需要浏览器携带token的cookie,才能访问这个服务
3.5:测试截图
3.5.1:没有cookie访问用户接口

3.5.2:访问auth 获得授权

3.5.3:再次访问用户测试接口

至此,简单jwt实现已经完成