SpringBoot简介
概述
SpringBoot是Spring生态的一个模块,现在有2个版本,但是SpringBoot2版本的更新幅度非常大,而且小版本更新也非常快!
在spring官网下划有2段话,就能看出Spring Boot的地位
With Spring Boot in your app, just a few lines of code is all you need to start building services like a boss.

--在应用程序中使用Spring Boot,仅需要几行代码就可以构建服务
Originally [Netflix's Java] libraries and frameworks were built in-house.
I'm very proud to say, as of early 2019, we've moved our platform almost entirely over to Spring Boot.”
作用
Spring Boot makes it easy to create stand-alone,
production-grade Spring based Applications that you can "just run".

--能快速创建出生产级别的Spring应用
特性
- Create stand-alone Spring applications
  创建独立的Spring应用程序
- Embed Tomcat, Jetty or Undertow directly (no need to deploy WAR files)
  直接嵌入Tomcat,Jetty或Undertow(无需部署WAR文件)
- Provide opinionated 'starter' dependencies to simplify your build configuration
  自动starter依赖,简化构建配置
- Automatically configure Spring and 3rd party libraries whenever possible
  自动配置Spring以及第三方功能
- Provide production-ready features such as metrics, health checks, and externalized configuration
  提供生产级别的监控、健康检查及外部化配置
- Absolutely no code generation and no requirement for XML configuration
  无代码生成、无需编写XML
参考地址
SpringBoot官网地址:https://spring.io/projects/spring-boot
SpringBoot版本说明:https://github.com/spring-projects/spring-boot/wiki#release-notes
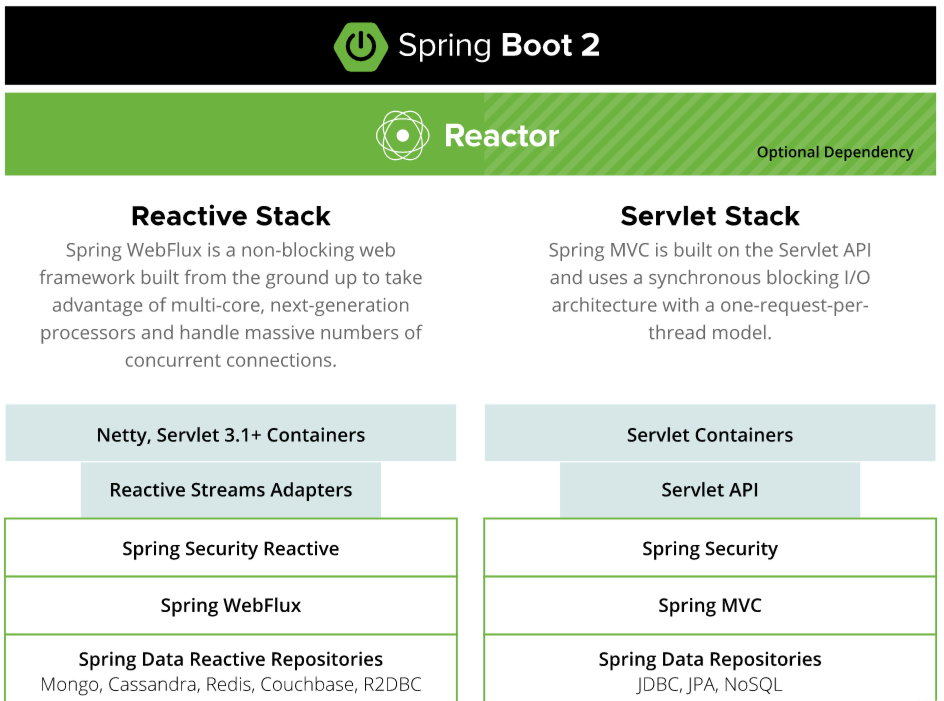
SpringBoot结构
SpringBoot入门
SpringBoot入门可以参考地址:
系统要求
| 工具 | 说明 |
|---|---|
| JDK | java8,兼容Java15 |
| Maven | 3.3+ |
| 或者Gradle | 6(6.3或更高版本) |
创建maven工程
引入依赖
<parent>
    <groupId>org.springframework.boot</groupId>
    <artifactId>spring-boot-starter-parent</artifactId>
    <version>2.3.7.RELEASE</version>
</parent>
<dependencies>
    <dependency>
        <groupId>org.springframework.boot</groupId>
        <artifactId>spring-boot-starter-web</artifactId>
    </dependency>
</dependencies>
创建主程序
@SpringBootApplication
public class MainApplication {
    public static void main(String[] args) {
        SpringApplication.run(MainApplication.class, args);
    }
}
编写业务
@RestController
public class HelloController {
    @RequestMapping("/hello")
    public String hello() {
        return "hello SpringBoot!";
    }
}
运行程序
执行主程序,浏览器发送:http://localhost:8080/hello
配置文件
web程序中有各种配置比如端口等,SpringBoot有默认值,但是也可以创建配置文件进行更改
比如:创建application.properties文件
server.port=9999
此时浏览器发送的地址为:http://localhost:9999/hello
简化部署
pom.xml
<build>
    <plugins>
        <plugin>
            <groupId>org.springframework.boot</groupId>
            <artifactId>spring-boot-maven-plugin</artifactId>
        </plugin>
    </plugins>
</build>
然后就可以把项目打成jar包,之后直接在目标的服务器执行即可!
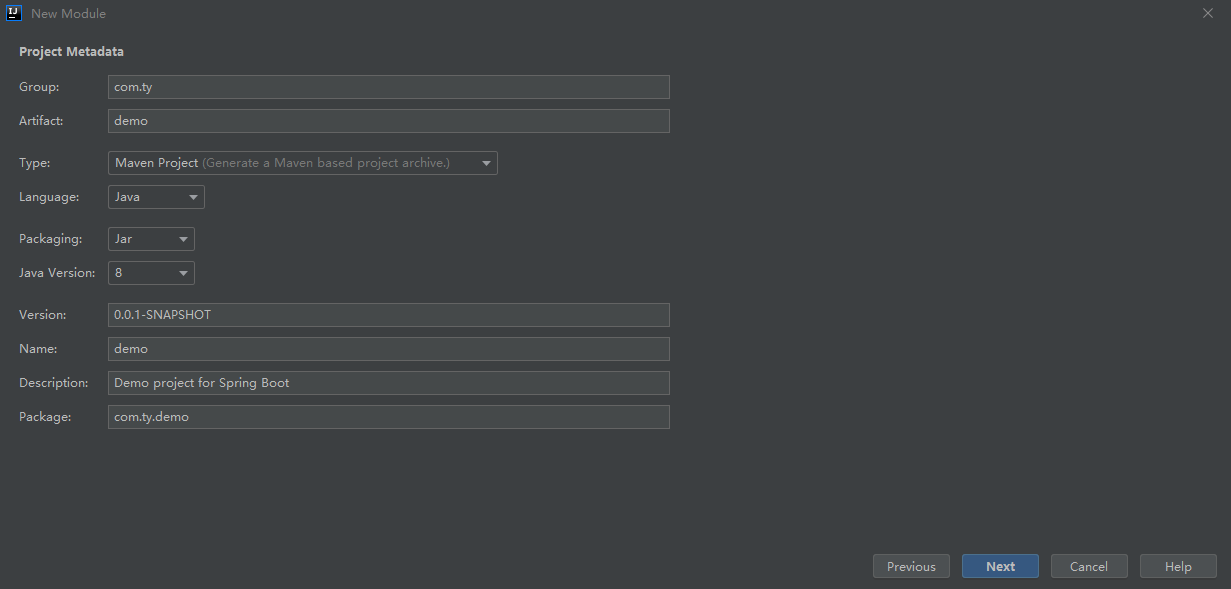
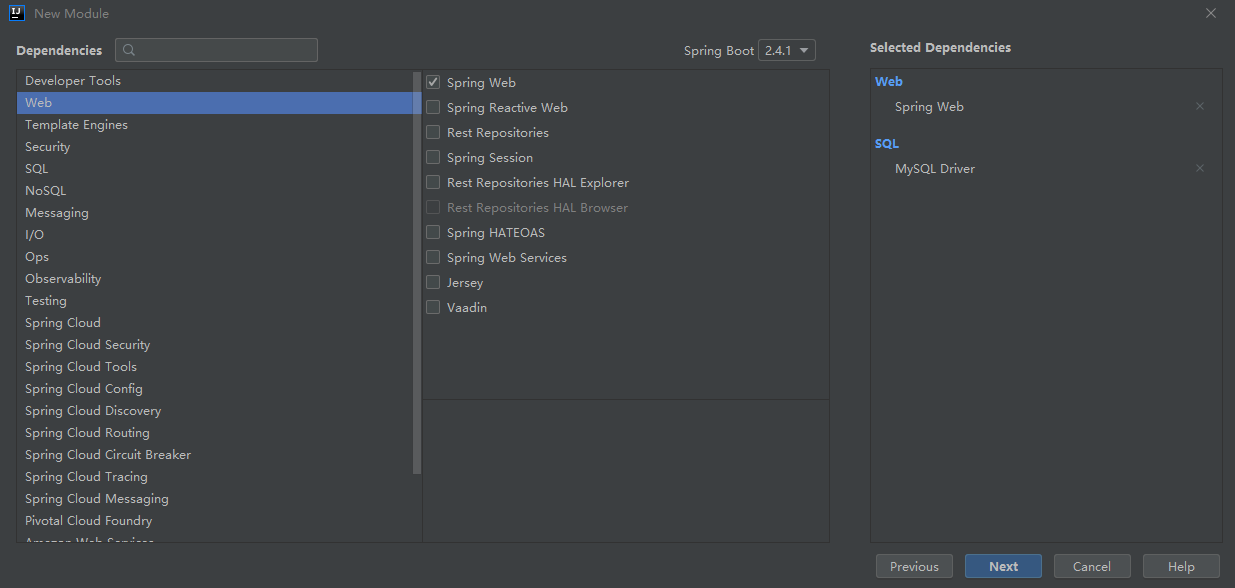
上面是用maven创建的项目然后进行编写,在IDE中可以使用项目初始化向导(Spring Initailizr)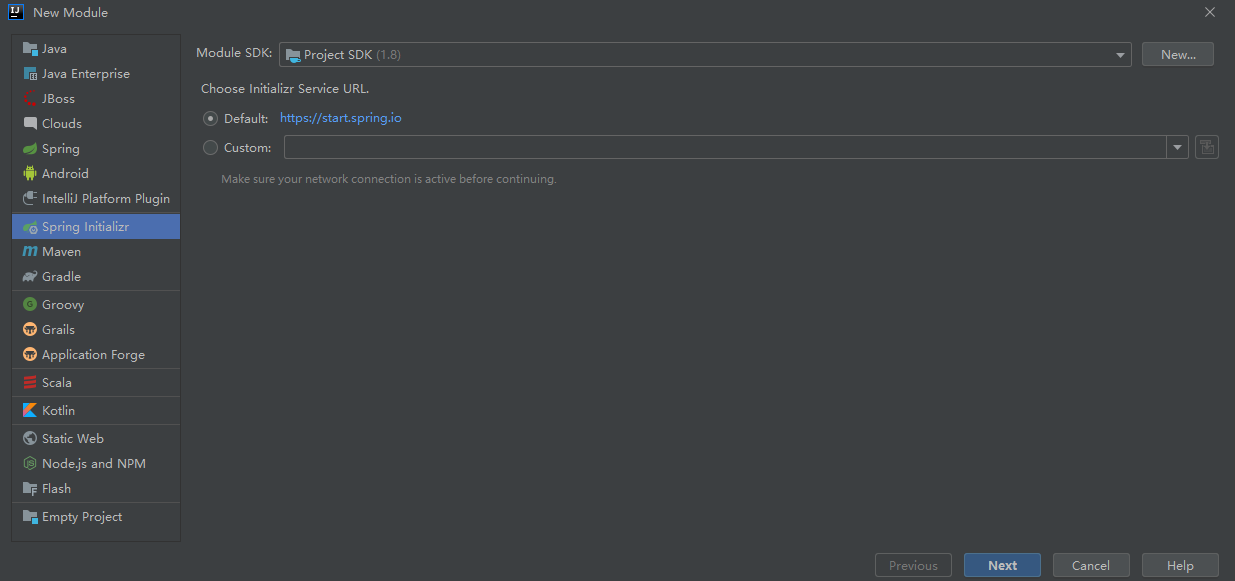

入门程序的说明
看一下引入的pom依赖
<groupId>org.springframework.boot</groupId>
<artifactId>spring-boot-starter-parent</artifactId>
<version>2.3.7.RELEASE</version>

点进去可见有一个父项目的依赖
<groupId>org.springframework.boot</groupId>
<artifactId>spring-boot-dependencies</artifactId>
<version>2.3.7.RELEASE</version>

接着点进去就可以看见里面有各种依赖,在里面搜索spring-boot-starter-web,可以看见
 <dependency>
    <groupId>org.springframework.boot</groupId>
    <artifactId>spring-boot-starter-web</artifactId>
    <version>2.3.7.RELEASE</version>
  </dependency>
ps:看见各种的spring-boot-starter-*,这是SpringBoot内置的启动器,表示此场景下所需的依赖都进行导入
starter参考地址:
看一下引入spring-boot-starter-web之后的jar包继承图
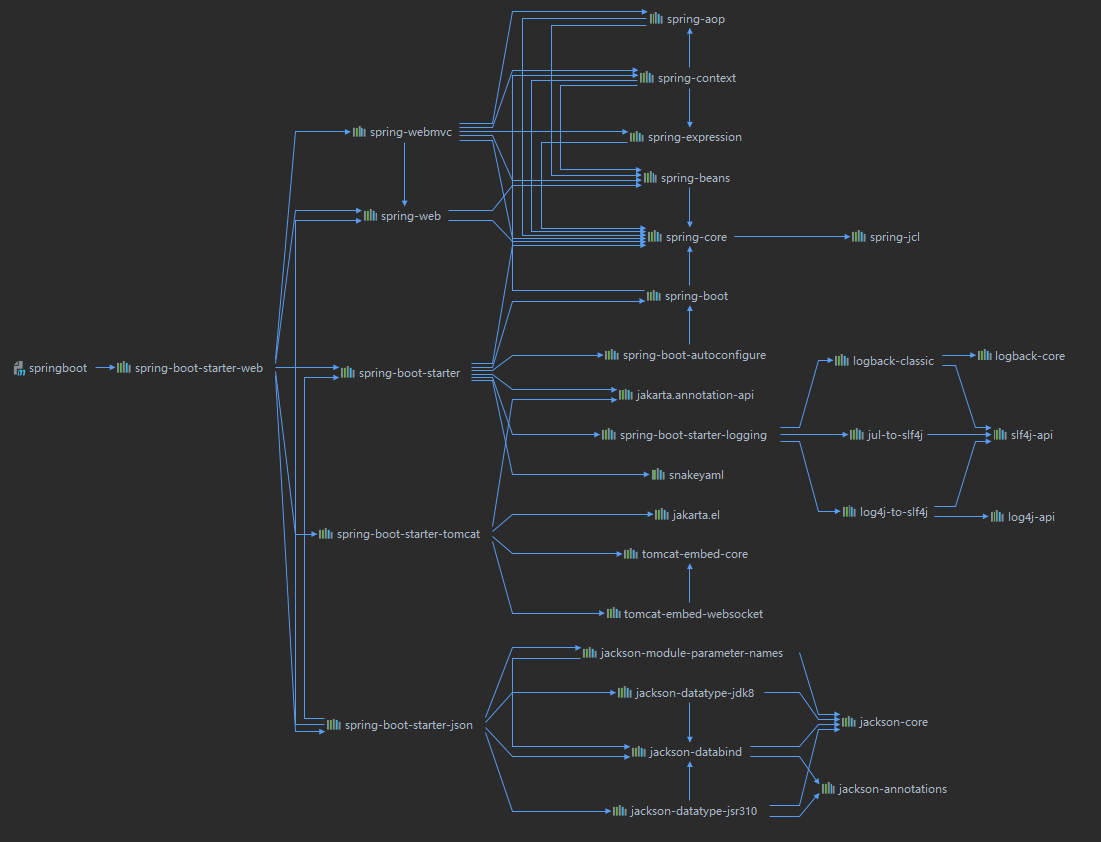
总结一下SpringBoot的自动配置特点
-
内嵌tomcat服务器
<dependency> <groupId>org.springframework.boot</groupId> <artifactId>spring-boot-starter-tomcat</artifactId> <version>2.3.7.RELEASE</version> <scope>compile</scope> </dependency> -
具有SpringMVC的功能,也就是SpringMVC的常用组件默认也都能做
<dependency> <groupId>org.springframework</groupId> <artifactId>spring-web</artifactId> <version>5.2.12.RELEASE</version> <scope>compile</scope> </dependency> <dependency> <groupId>org.springframework</groupId> <artifactId>spring-webmvc</artifactId> <version>5.2.12.RELEASE</version> <scope>compile</scope> </dependency> -
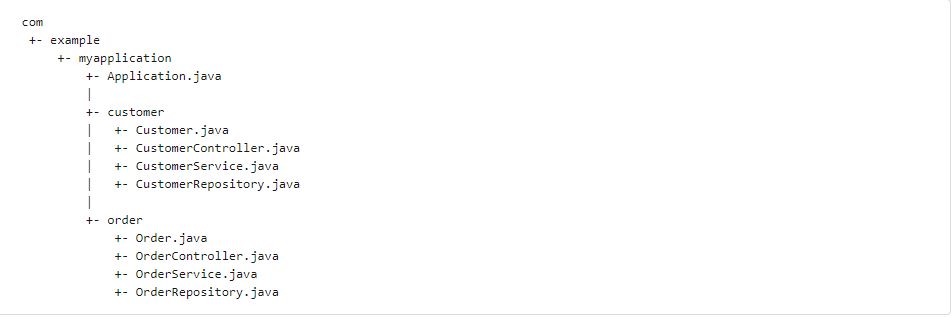
默认的包结构:主程序所在包及其下面的所有子包里面的组件都会被默认扫描进来,依靠的就是@SpringBootApplication注解
-
具有默认配置
引入所需的场景starter之后,就有了此starter的默认配置,是以类展现的
比如:
public class Tomcat {

 	protected Server server;
    protected int port = 8080;
    protected String hostname = "localhost";
    protected String basedir;
------------------------------------------------------------
 @ConfigurationProperties(
    prefix = "spring.servlet.multipart",
    ignoreUnknownFields = false
)
public class MultipartProperties {
    private boolean enabled = true;
    private String location;
    private DataSize maxFileSize = DataSize.ofMegabytes(1L);
    private DataSize maxRequestSize = DataSize.ofMegabytes(10L);
    private DataSize fileSizeThreshold = DataSize.ofBytes(0L);
    private boolean resolveLazily = false;